Understanding DIY Dog Console Car Seats
Benefits of a DIY Approach
Taking a DIY approach to creating a dog console car seat has several benefits. Firstly, it allows you to customize the seat to perfectly fit your car and your dog's needs. You can choose the materials, padding, and design that will provide the utmost comfort and safety for your furry friend. Additionally, a DIY project can be a cost-effective solution compared to purchasing a pre-made car seat. It gives you the opportunity to repurpose materials you already have or find affordable options at your local stores. Finally, building a dog console car seat yourself can be a rewarding experience, allowing you to showcase your craftsmanship and create a unique product tailored specifically for your beloved pet.
Types of Dog Console Car Seats
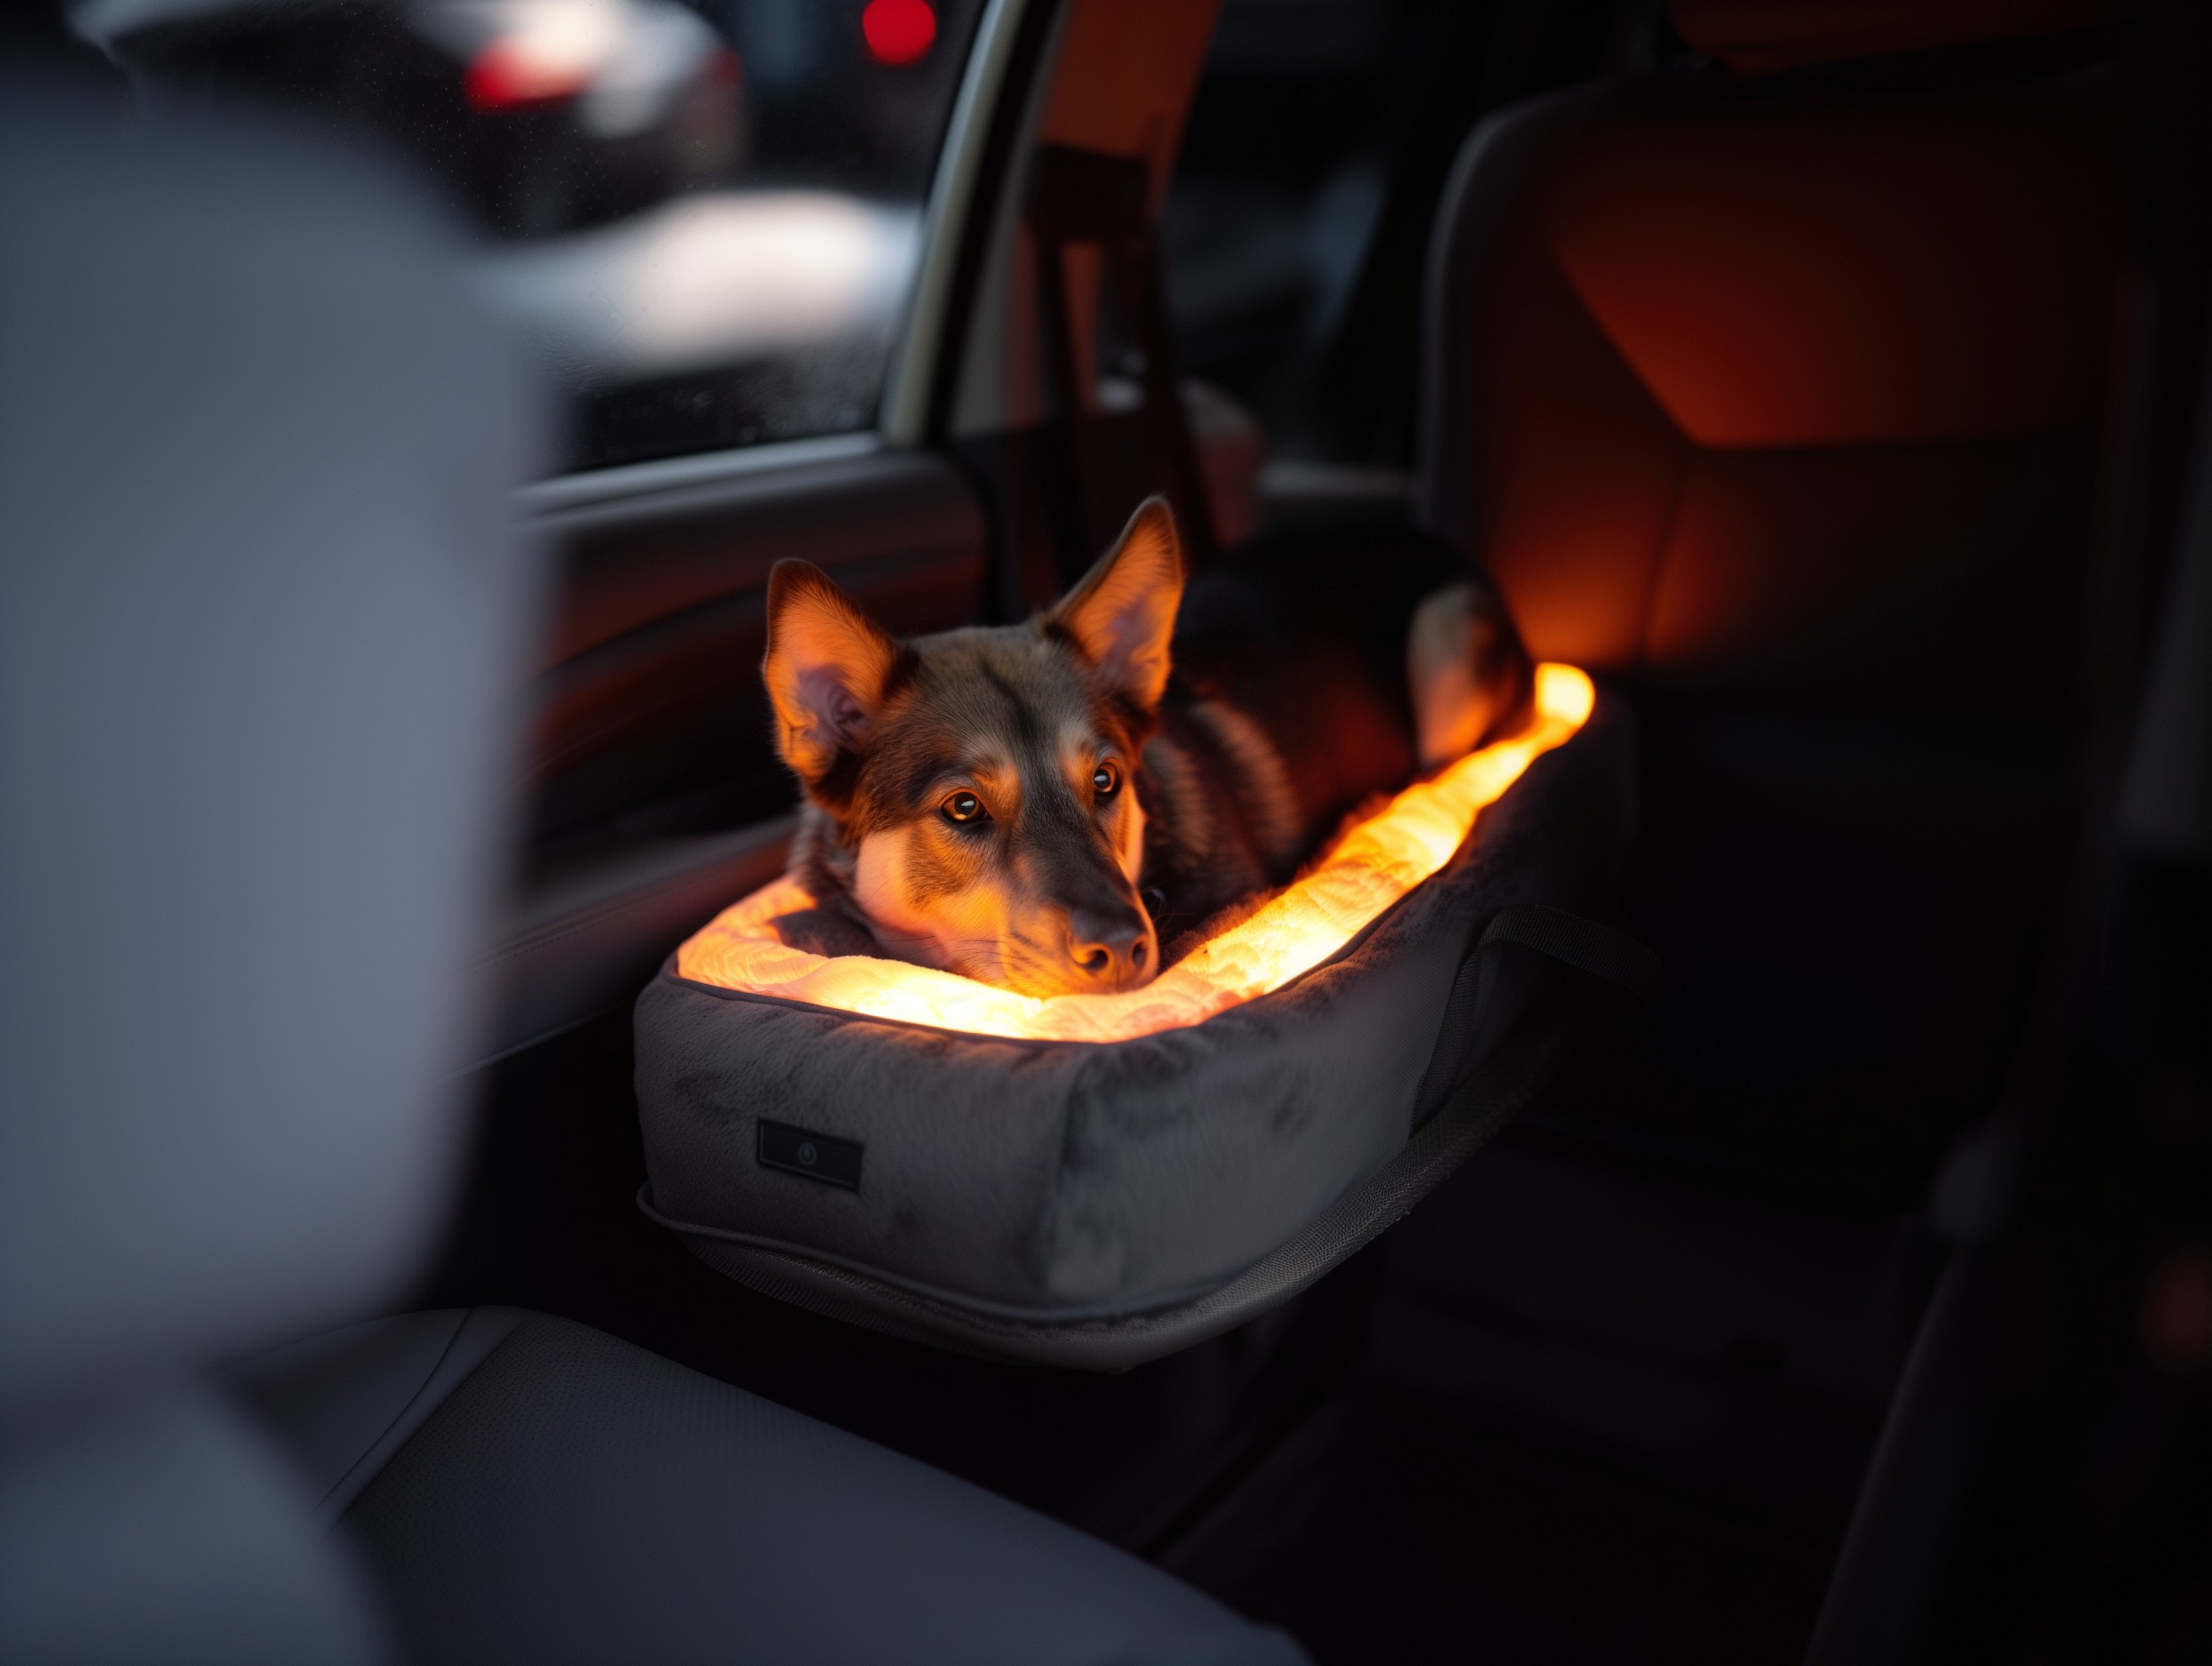
When it comes to dog console car seats, there are various types available to choose from. One common type is the booster seat, which elevates your dog to a higher position, allowing them to look out of the window while ensuring their safety. Another popular option is the hammock-style seat, which provides a comfortable and secure space for your dog to relax during car rides. Some car seats come with built-in harnesses or seat belts to provide additional safety measures. Additionally, you can find car seats with storage compartments to keep your dog's essentials organized. Consider the size and weight capacity of the car seat to ensure it can accommodate your dog's breed and size.
Safety Considerations
When prioritizing your dog's safety in a console car seat, there are several important considerations to keep in mind. Firstly, ensure that the car seat is securely attached to the console and doesn't shift or move during the ride. This will prevent any accidents or injuries. Look for car seats with sturdy construction and robust straps or buckles for added security. It's also crucial to choose a car seat that provides proper support and comfort for your dog, preventing any discomfort or strain. Consider the material used in the car seat, ensuring it is durable, easy to clean, and resistant to wear and tear. Finally, always follow the manufacturer's guidelines and recommendations for weight limits and usage instructions to ensure optimal safety for your furry companion.
Planning Your DIY Dog Console Car Seat
Measuring Your Dog and Console Space
Before starting the DIY dog console car seat project, it is important to measure your dog and the available console space in your car. Measure the length, width, and height of your dog to ensure they will fit comfortably in the car seat. Additionally, measure the dimensions of your car's console to determine the appropriate size for the seat. Taking accurate measurements will help you choose the right materials and design for your DIY dog console car seat.
Choosing the Right Materials
Opt for durable and pet-friendly materials that are easy to clean and maintain. Consider using sturdy fabrics or upholstery that can withstand wear and tear. Foam padding or cushioning can provide comfort for your dog during car rides. It's important to select materials that are safe for your dog and will not cause any harm or discomfort. Research different options and choose materials that best suit your dog's needs and preferences.
Design Considerations
When designing your DIY dog console car seat, there are several considerations to keep in mind. First, ensure that the seat is securely attached to your car's console to prevent any accidents or movement while driving. Incorporate adjustable straps or harnesses to keep your dog safely restrained. It's also important to create a design that allows for easy installation and removal of the car seat. Consider adding storage compartments or pockets to store essentials such as toys, treats, or waste bags. Additionally, think about the overall aesthetic of the car seat and choose a design that complements your car's interior.
Gathering Materials
Fabric and Cushioning Choices
When choosing fabric and cushioning for your DIY dog console car seat, it's important to consider durability and comfort. Opt for a fabric that is both tough and easy to clean, as your furry friend may leave behind hair or dirt. Look for materials like nylon or polyester that are resistant to stains and can withstand wear and tear. Additionally, choose cushioning that provides adequate support and is comfortable for your dog during car rides. Memory foam or high-density foam can be great options to ensure your pet's comfort.
Safety Harnesses and Attachments
One essential component is a reliable safety harness. Look for harnesses that are specifically designed for use in cars and have been crash-tested for added peace of mind. These harnesses should have sturdy attachments that can be secured to the car seat, ensuring that your dog stays in place during the ride. Additionally, consider using attachments that allow your dog to move around comfortably while still preventing them from jumping out of the car seat.
Tools Needed for Assembly
To assemble your DIY dog console car seat, you will need a few essential tools. Start with a measuring tape to determine the dimensions of your car seat and ensure a proper fit. You will also require a sewing machine or needle and thread to sew the fabric and cushioning together. A pair of scissors will be necessary for cutting the materials to size. Additionally, you may need a staple gun or adhesive to secure the fabric and cushioning to the base of the car seat. Having these tools on hand will make the assembly process smoother and more efficient.
Step-by-Step Construction Guide
Cutting and Sewing the Fabric
Measure and cut the fabric according to the size of your car console, leaving enough room for padding. Sew the pieces together, making sure to reinforce the seams for durability. Use a heavy-duty sewing machine and strong thread to ensure the seat can withstand the weight of your dog.
Assembling the Frame
Once the fabric is ready, it's time to assemble the frame of the dog console car seat. Start by measuring and cutting the PVC pipes according to the dimensions of your car console. Connect the pipes using PVC connectors, creating a sturdy frame. Secure the frame to the fabric using zip ties or strong adhesive. Make sure the frame is stable and can hold the weight of your dog.
Installing the Safety Harness
Choose a harness that is suitable for your dog's size and strength. Attach the harness to the seat frame using strong straps or carabiners. Test the harness to ensure it is secure and can withstand sudden movements. Always prioritize your dog's safety and comfort when installing the safety harness.
Installing the DIY Dog Console Car Seat in Your Vehicle
Securing the Seat to the Console
To securely attach the DIY dog console car seat to your vehicle's console, start by placing the seat on the console and adjusting the straps to fit snugly. Make sure the seat is centered and stable before proceeding. Then, use the provided adjustable straps to secure the seat to the console. Attach the straps to the console base and tighten them to ensure a firm and secure attachment. Double-check that the seat is properly secured and does not wobble or move when pressure is applied.
Adjusting for Your Dog's Comfort
Start by adjusting the height of the seat to ensure your dog has a clear view out of the window. You can also adjust the incline of the seat to find the most comfortable position for your furry friend. Additionally, consider adding a soft cushion or blanket to provide extra comfort. Regularly check and adjust the seat to make sure your dog remains comfortable throughout the journey.
Safety Checks Before Use
First, inspect the seat for any signs of wear or damage. Check the straps, buckles, and fasteners to ensure they are in good condition and securely attached. Test the stability of the seat by applying gentle pressure and ensuring it remains stable. Finally, secure your dog properly in the seat using the provided harness or attachment. Always prioritize your dog's safety by following these safety checks before each use.
Maintenance and Care
Cleaning and Sanitizing
To keep your DIY dog console car seat clean and sanitized, it's important to regularly remove and wash the fabric cover. Use a gentle detergent and follow the manufacturer's instructions for cleaning. Additionally, you can use a pet-safe disinfectant spray to sanitize the seat after cleaning. Make sure to thoroughly dry the cover before reassembling the car seat to prevent any mold or mildew growth.
Regular Safety Inspections
Check for any loose or damaged parts, such as buckles, straps, or hooks. Make sure all the components are securely fastened and in good working condition. Inspect the seat's attachment to the console for stability and ensure it is properly installed. If you notice any defects or signs of wear, it's important to repair or replace the affected parts immediately to maintain the seat's safety standards.
Making Adjustments for Wear and Tear
Over time, wear and tear can affect the functionality of your DIY dog console car seat. To make necessary adjustments, regularly inspect the seat for signs of wear, such as frayed straps or worn-out padding. Replace any worn or damaged parts to maintain the seat's integrity and safety. Additionally, consider adjusting the seat's size or height as your dog grows or if you have multiple dogs of different sizes using the seat. Adapting the seat to accommodate changes will ensure a comfortable and secure travel experience for your pets.